Desktop email applications have their own importance but sometimes users need to switch to web-based platforms to avail benefits of updated features. While working with Windows Live Mail, Thunderbird, Apple Mail, etc. users need to work with EML files as this file format is supported in these email clients. This article will come with a free solution to import EML files into MS Office 365 to avail advantages of working in the cloud from any device.
Table of Contents
Basic Information – EML & Office 365
EML is a standard mail format that is widely used by Outlook Express, Windows Live Mail, Windows Mail, Thunderbird, Apple Mail and other programs. But due to advancement in technology, users are switching towards more flexible platforms. That’s why users need to import EML data files into Office 365.
On the other hand, Office 365 is one of the top web based email clients. It has integrated calendars, contacts, notes, tasks, etc. within your inbox. Now, the question here is why one wants to import EML emails into Office 365. Below are the few reasons for importing EML to O365.
Reasons For Importing EML Data Files Into Office 365
- We all know that Office 365 is the most trusted and valuable email service for users. It is developed by Microsoft.
- It offers safe and free email services management.
- Office 365 is safe cloud storage service that facilitates receiving and sending email options to users. Also, one can easily access Word, PowerPoint, & MS Excel Online.
- It provides the facility to users to access and work with data anytime.
- It well organizes all attachments in one spot, so no more hunting for files.
These are various common reasons that insist users to import EML files into Online Exchange (Office 365).
Suitable Methods To Import EML Database Into Office 365 Cloud
In this part, we will help you to import EML items into Outlook 365. For this, we have discussed annual and automated tools.
Import EML Messages To Office 365 Manually
The manual procedure is divided into two parts: import EML files to PST and import these PST files into Office 365.
Part 1. Import EML Data Files Into PST Format
- Firstly, open Windows Live Mail on your system.
- Now, click on File and move to Export Email to select Email messages option.

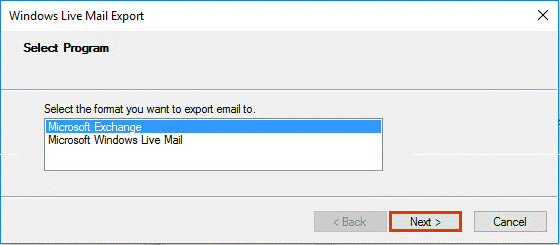
- In next tab, choose Microsoft Exchange from program list and click
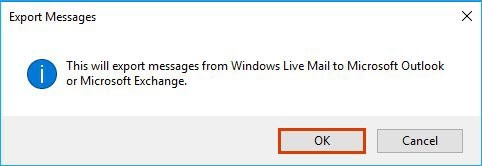
- In notification screen for confirming the export messages, click OK.
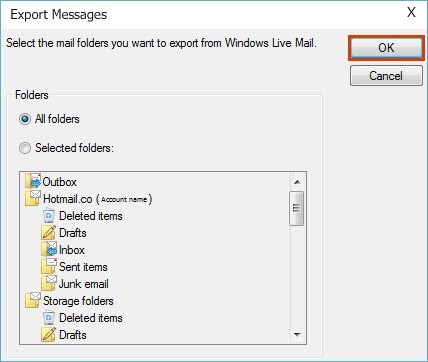
- Select files and folders you want to import from Windows Live Mail to Office 365. Then, click OK.
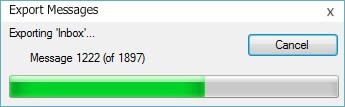
- In new window where screen displaying the conversion process.
- When you got a confirmation message of completion of conversion process, click on the Finish
Part 2. Import PST Files Into Office 365
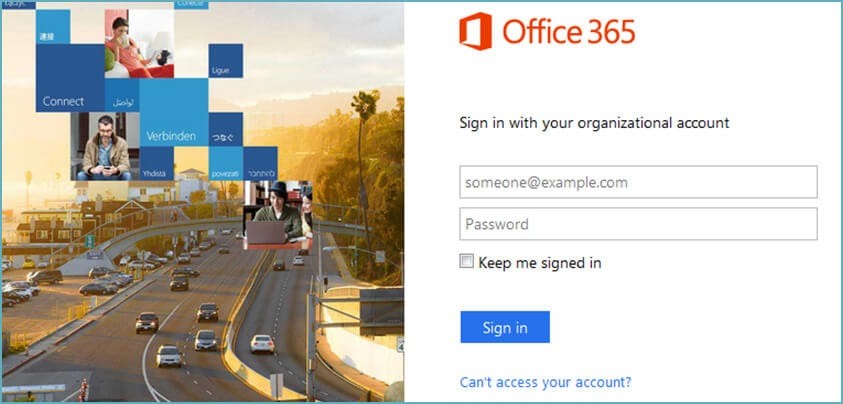
- Run Office 365 on your PC with login credentials.
- Move to Import page of Data governance and create a new job for uploading data to Office 365 storage path.
- Copy and then save the network upload SAS URL.
- Now, download & install Azure AzCopy tool and launch it.
- Use Command prompt to upload PST to Office 365 using AzCopy Tool.
- After that, create a CSV file that contains all mailbox details
- Create a PST import job to validate CSV file.
- Finally, import PST files directly into Office 365. Here, you have the option to filter PST files if required.
Why Does The Manual Solution Fail?
Undoubtedly, manual solutions are available freely but they have some disadvantages as well like –
- To use manual solution, MS Outlook and Windows Live Mail installation is must in the system.
- Users must have technical skills to understand the manual process.
- You may get or may not get attachments in Office 365 account. There is risk of losing attachments and email components.
- Not all email clients like Thunderbird, Outlook Express, etc. emails are moved into Office 365 account.
Professional Utility To Import Bulk EML Files To O365 Environment
With DailySoft EML to Office 365 Importer Software, one can directly import EML emails with attachments into Office 365 account. It is designed with highly advanced algorithm to import EML files in bulk mode into Office 365 account.
Here Is The Working Procedure Of This Software:
- Install and Launch EML to O365 Importer Software on your Windows system.
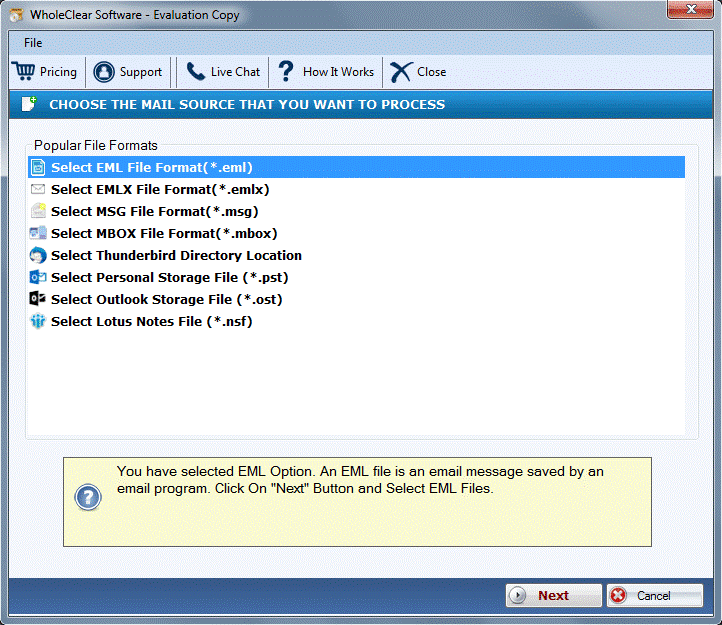
- Select EML File Format and click Next.
3. Add EML Files or Folder at once to move into Office 365 account. 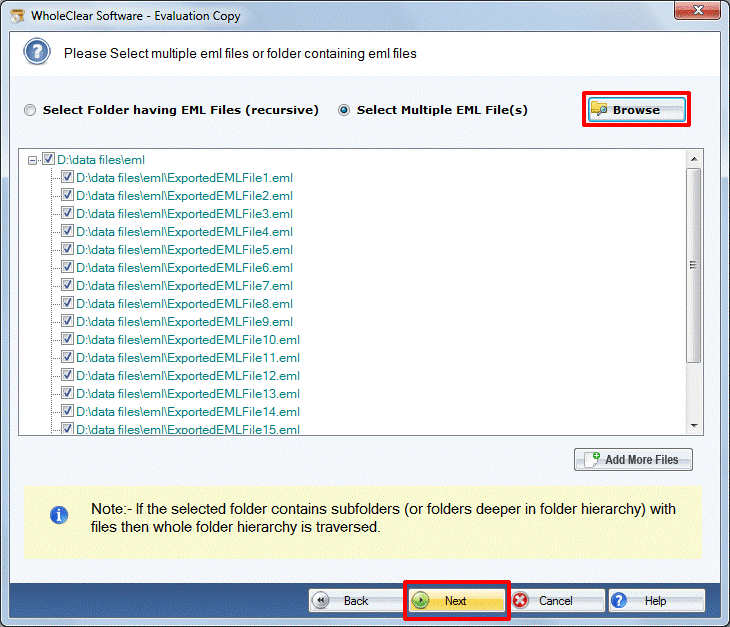
4. Choose Office 365 account and click Next.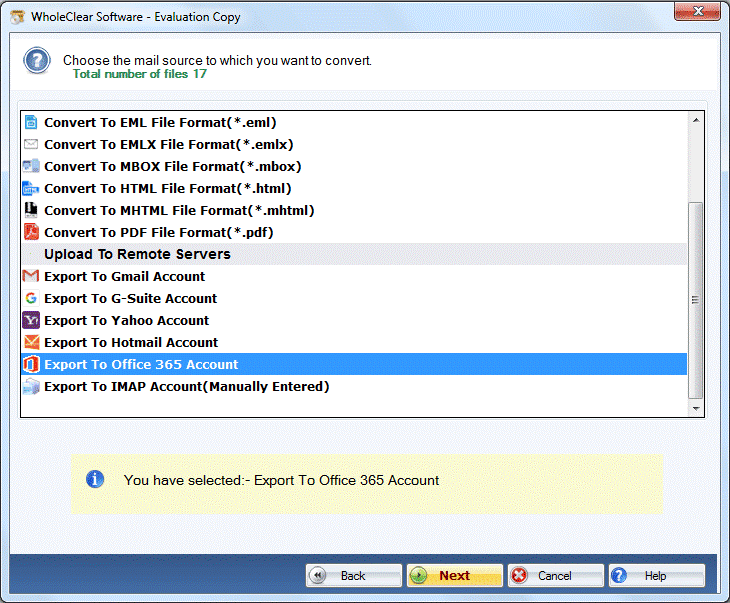
5. Enter username and password of Office 365 account. Click on Authenticate User
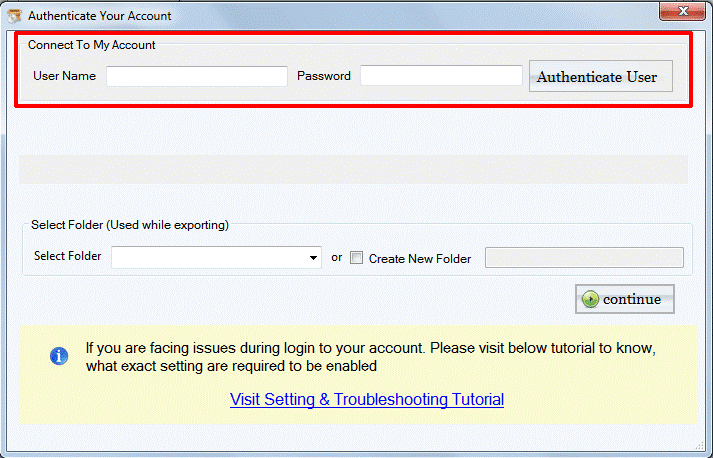
6. Select any folder or create a new folder in Office 365 for importing EML files. 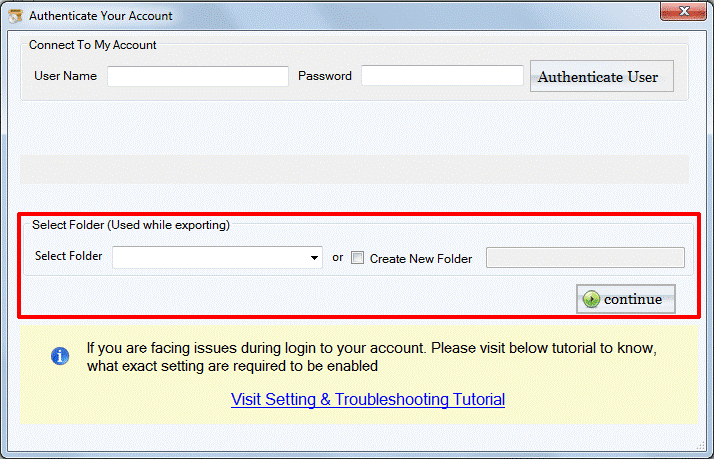
7. Hit the Upload Now button to begin import process of EML files into MS Office 365 account.
Key Highlights Of Professional EML To Online Exchange Importer
- It is fully safe application for directly upload of EML email messages into Office 365 account.
- This program takes care of attachments while importing EML messages into O365 account.
- It smoothly imports EML files in batch mode without any size restrictions.
- Maintain email components and database structure throughout the migration process.
- Only few simple steps to upload EML data items into Office 365 account. No technical skills required.
- Fully workable on Windows 10, 8.1, 8, 7, and others.
Conclusion
We have discussed all ways by which one can import EML data files into Office 365 account. This post talks about manual process which is free to use but comes with limitations. In case you don’t find manual solution suitable for you, we advise you to choose professional software which is one-time investment & is available in many versions. Users can purchase desired license as per their requirements.